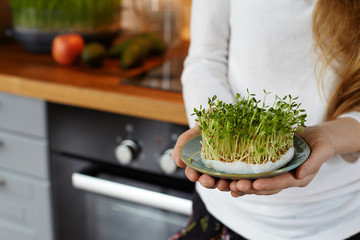
Microgreens were originally used by gourmet chefs in their kitchens for the visual treat they offered. They soon gained popularity as they were also high in flavour.
Sometimes called “vegetable confetti”, microgreens are greens that are harvested when they are still very young. They are the first green shoots of germinated seeds with only two leaves on top; they are neither sprouts nor greens with true leaves of the plant. These tiny attractive looking greens are loaded with nutrition and pack a flavourful punch.
Microgreens come loaded with nutrition and have about 40 times more nutrition than the fully grown greens or veggies.
Why bother growing them when I can buy them?
Ever since they have become a household name they are increasingly available at most supermarkets. Yet, I urge you to grow them so that you know the source of seeds and get them without the chemicals or growth boosters that commercially grown microgreens contain. Besides, they are easy and quick to grow—a perfect way to get your children started into gardening.
You can grow them in almost anything from coconut shells to cardboard boxes and broken ceramic mugs which can be placed on a window sill, a warm kitchen counter-top or a small balcony.
Which seeds can be used to grow microgreens?
Almost any seed can be used to grow microgreens, be it salad varieties, edible flowers, greens or vegetables.
The common ones are
- Radish
- Mustard [from your kitchen spice box]
- Red amaranthus
- Fenugreek
- Fennel
- Beetroot
- Alfa alfa
- Garden cress
How to grow?
Method 1
 The easiest way to grow them is to fill your pot/ growing container with loose soil mixed with vermicompost and moist cocopeat. Sprinkle the seeds on top of this mix and press them down. [Do not forget to press them down while sowing otherwise when they germinate you will see tiny shoots and the heads still covered with seed.] Cover the seeds with one inch layer of moist cocopeat or half an inch of the same potting mix used in the container. Water generously and then wait. Mustards, radishes, fenugreek greens will shoot out of the soil within two days. Place them on a window that is in partial shade—avoid full sun, as microgreens are delicate. Wait for the plant to grow to 2-3 inches height with two leaves on top. This should take about 7-10 days.
Snip away with kitchen scissors and use them promptly.
Method 2
Another way to grow them is to just dig some top soil on your already existing pots with plants and scatter the seeds, press them down and spread some soil on top. Water well and then wait. This way you don’t need to fill a new pot and can have an endless supply of microgreens with successive sowing.
How to use them?

- Microgreens can be added to smoothies and salads as they are best consumed raw
- Radish microgreens taste great in parathas
- Alfa alfa/red amaranthus/beets are delicious when sprinkled over salads
- Mustard microgreens pair well with fish. Just scatter them on steamed fish for a pungent and crunchy contrasting flavour and texture to the palate
- Methi microgreens have been used traditionally in the Indian kitchen since a long time. They work very well with avacodo, cherry tomatoes, black olives, grated carrots with a squeeze of lime juice.

A quick and easy recipe
- Mash a ripe avocado, mix some salt, lime juice and spread it on thick slices of bread
- Layer with tomato slices, boiled egg wedges and radish microgreens
- Your breakfast sandwich is ready.
Note : You can skip the avocado if you wish
 Spot an error in this article? A typo maybe? Or an incorrect source? Let us know!

Hi,
I love to know about microgreen and its benefits and how to grow it.
I will love to receive more information about it.
Khan